EARLY IRON
Experimental Group
 |
EARLY IRON Experimental Group |
EARLY IRON ... is a gathering of individuals who have a keen interest in the smelting of iron from ore.
EARLY IRON ... grew from the first 'Pre-Industrial Iron Symposium' organized by Michael McCarthy at the Farmers Museum at Cooperstown New York USA, in October 9 - 11, 2004. Annual symposiums have been held on that weekend since that starting year.
EARLY IRON ... will be of interest to those using historic prototypes to design and fire small scale smelters. The stress is most likely to be on actual experimental firings, with academic research serving to support the generation of direct practical experience (experimental archaeology).
Editor's Note: This site is its initial phase, expect more additions!
Last Modifications : February, 2008
To try to conserve space on Geocities - as much as possible this web site will make use of remote loaded images and links to other web sites.
|
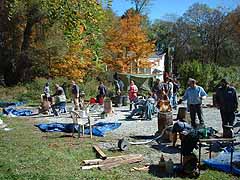
the Farmers Museum, Copperstown NY October 8 - 11, 2004 |
 |
|
the Farmers Museum, Copperstown NY October 8 - 11, 2005 |
 |
|
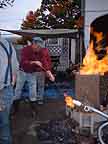
Peter's Valley Craft
Center - Layton, NJ |
 |
Getting Started
(A note by Lee Sauder on some basic approaches)
... So here's 4 good options for general approaches to test furnaces:
1) Modern Materials. Steel lined with castable refractory. We used "Mizzou"
from Harbison- Walker Refractories. Occasional patching with "Greenpatch
421" I'm getting ready to try a new one along these lines using their rammable
refractory, which shows promise. This way is absolutely bulletproof, but it
sure ain't cheap. some rough plans at iron.wlu.edu/furnaceplans.htm
But the refractory does not need to be as thick as shown...
2) Storebought clay. Our best recipe so far is straight kaolin (the one we've
used is EPK) mixed with charcoal fines. I couldn't give you a definite ratio,
but lots of charcoal. Maybe half and half by weight? A bit of sand seems to
make it a little more plastic and workable.
(Darrell's Note: we have been mixing about 50% plain ball clay with about
45 % chopped straw by volume, the balance course sand. Covered with a garbage
bag, these furnaces last through a Canadian winter. To date we have only done
three smelts in one furnace, but with repair there is no reason not to expect
4 - 5 uses, like was done historically with this type. Cost for materials is
about $40 CDN. Check my documentation at www.warehamforge.ca/ironsmelting/index.html
)
3) Flue tile furnace. Good if you have an unknown clay. See details at iron.wlu.edu/Coatedtyle%20Construction.htm
It's not that durable (Ithink the best we've gotten out of one is 3 smelts.
) but easy and cheap. If you use this constuction just for the shaft, and use
good firebrick for a hearth (from a few inches above tuyere on down) it can
be right tough. I just smelted in one yesterday that has been through I think
6 smelts, and has been in the weather (just covered with a tarp) for a year.
(Darrell's note: This is the test smelter used by the participants of the
Early Iron Symposiums - with repeated excellent results!)
4) Darrell's "econo-norse"- There's nothing durable about it, but
it's quick and cheap! A few firebricks, dirt and sheet metal. There are details
about it ... on his vast sprawling empire of website at www.warehamforge.ca/ironsmelting/EconoNorse/index.html
(Darrell's note: The majority of the bricks used are completly undamaged and thus re-useable. The four right at the tuyere may only last through 3 or 4 firings.)
The materials on Early Iron are presented in the spirit of sharing information.
We ask however that you respect the copyrights of the various contributers.
All text and images remain copyright the original creators.
This general copyright statement
can be applied to all materials seen here unless stated otherwise.
Web Design by Darrell Markewitz - CONTACT for suggestions.